Sewing - Miscellaneous Bike Items
All content copyright © 2010-2024 Frank Revelo, www.frankrevelo.com, United States copyright office registration number TX-7931345
Brake band
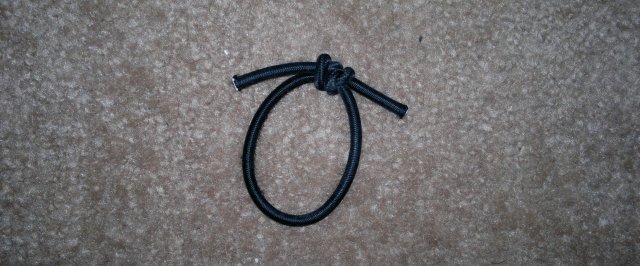
Cut 12" of 3/16" shock cord and tie into a loop with fisherman's knot. Holds front brake secured. Can also be used on rear brake, but brake band tends to fall off right side of handlebar, whereas left side has mirror, which prevents brake band from falling off. 5g.
Spare cable holder
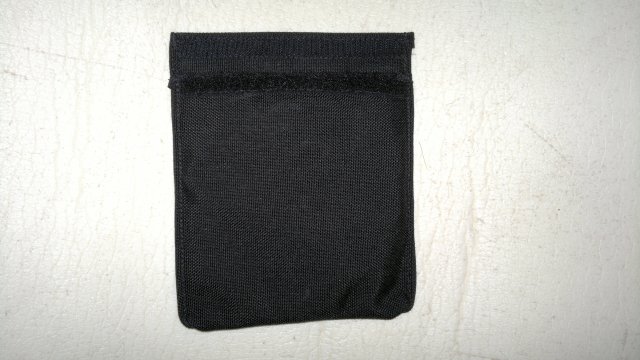
Holder for coiled spare cables, so they won't cut into other items in bike spares/maintenance kit. Cut 6x13" of 1000d cordura and 5" of 1/2" hook-and-loop. 1/4" hems on all sides of cordura. Attach hook to inside of one end of cordura, loop to outside of other end. Fold and top-stitch sides. 20g.
File holder
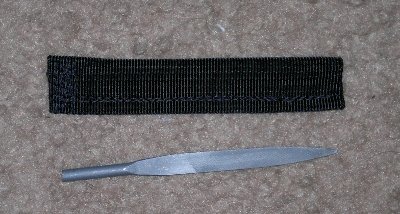
Semi-oval steel file measures 3.5" long. (Came as part of package of 10 miniature file and screwdriver bits at the discount store.) Curved and flat sides for smoothing rough edges. Pointed end for opening crushed brake and gear cable housing. To keep pointed end from causing damage to other gear, make holder as follows. Cut 1.5" nylon webbing 4" long. Fold in two and stitch sides and bottom. Fit should be snug enough that holder does not fall off easily. Sear ragged edges of folded and stitched webbing. Apply fray-check to all stitching. File weighs 7 grams, holder weighs 3 grams, combination weighs 10 grams.
Rack Mudguard
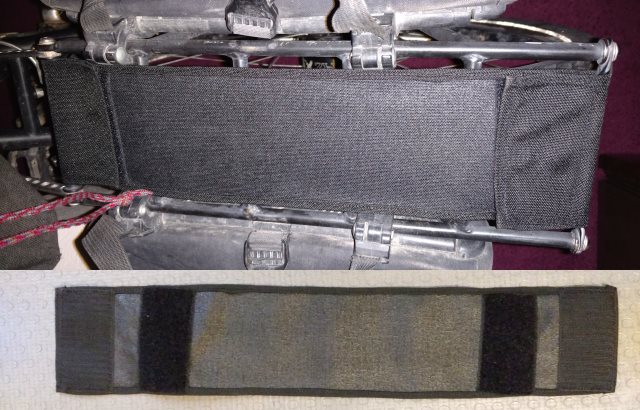
Fabric mudguard for top of Thorn rear rack. Not as good protection as a true mudguard, but much easier to attach-remove. Only used in city, since rackbag provides protection while touring. Cut 21" x 4.75" 1000d cordura. 3/8" hems on long sides. Cut 2 x 3.75" strips of 2" hook-and-loop. For each short end, fold under 1/2", attach hook piece, then 1" gap, then attach loop piece. Final size 20" x 4".
Straps for dromedary bladders
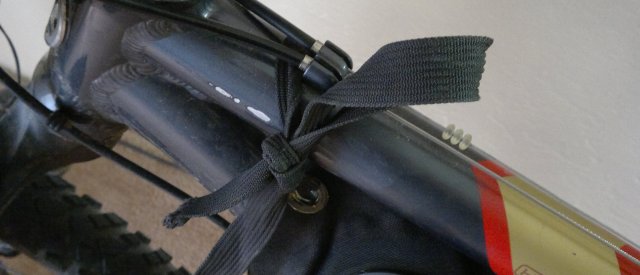
bladder tied to front of Novara's top tube with square knot, similar attachment to rear of top tube
Cut 3/4" nylon webbing 22" long, then sew 3-layer hems on the ends (fold, then fold again, then stitch with a bartack). Feed strap through top and side grommets of each bladder, then tie an overhand knot in the end to secure in place. 3/4" straps are easier to work with than the 1/2" straps that come with the bladders, in my opinion.
(Novara only) Cut 3/4" nylon webbing 32" long, rather than 24". Feed one straps through each end grommet and hang from top tube as follows. Position front strap forwards of frontmost top tube cable housing boss, rear strap behind rearmost boss. Square knot with quick-release holds well and is easy to untie, but other knots will also work. Straps for the remaining bladder can be cut 24", however cutting all straps 32" before hemming allows those on the other bladders to be spares for those used to hang the bladder from the tob tube, though the likelihood of a strap breaking is extremely remote.
Mud flap
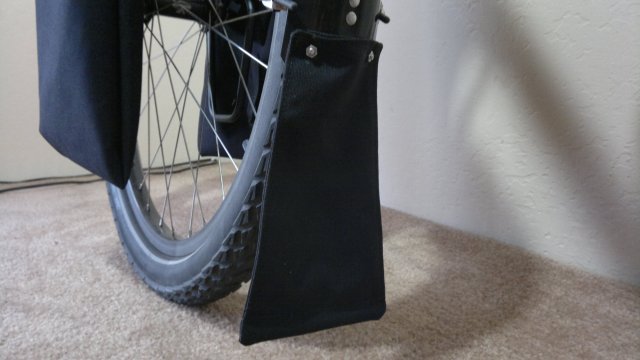
The SKS P65 fenders/mudguards I experimented with either did not come with a mudflap, or the mudflap was missing (I bought the fenders from a discount company), so I made my own from 1000d cordura fabric. Finished size is about 3" wide at the top, 8" long and 4.75" wide at the bottom. Cut two pieces of fabric sightly larger than this, sew together on sides and bottom, trim seam allowances, turn inside out. Then insert a 4.5" piece of steel rod (use trimmings from rear fender stays) into bottom of mud flap to keep it weighted down. Fold together top seam, topstitch on all four sides. Bore two holes with soldering iron, corresponding to holes drilled into bottom of front fender. Attach mud flap to fender with bolts. About 30g.
Webbing cassette removal clamp
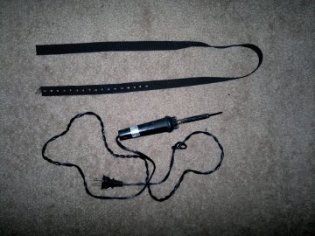
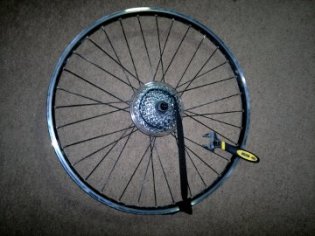
Ultralight substitute for chain whip. Holds sprockets in place to allowing unscrewing cassette lockring, as is normally required for repairing broken rear-wheel drive-side spokes. Cut 40" length of 3/4" wide nylon webbing. Using soldering iron, melt holes about 5mm in diameter, spaced exactly 1" apart (same spacing as teeth on sprockets) along 16" of webbing (16 holes approximately). Weighs 15 grams.
First photo above shows webbing clamp and soldering iron used to bore holes. Second photo shows webbing clamp installed on wheel, lockring removal tool held in place by quick-release skewer, adjustable wrench used to turn lockring removal tool.
Usage as follows:
- Remove rear wheel. On my bike, this requires deflating the tire, due to limited clearance between brakes, even after opening the quick-release on the brakes.
- Remove tire from wheel. If tire is not removed, webbing will be tied around tire rather than rim, causing a pinch flat to the tube as the webbing is pulled tight.
- Remove quick-release skewer.
- Install cassette lockring tool (Park FR-5 or equivalent) and replace quick-release skewer, without springs, to hold lockring tool in place. Put quick-release springs someplace where they won't get lost.
- Attach webbing clamp around second-largest sprocket, by fitting teeth on sprocket into holes in webbing. Slide remainder of webbing clamp between largest and second-largest sprockets, and pull towards rim. Tie to rim using clove-hitch with quick-release. Webbing should be positioned such that broken spoke is close to where the webbing attaches to the rim. Remember, spokes work by pulling, not pushing.
- Unscrew lockring using adjustable wrench. Webbing may slip as it is pulled tight. If it slips too much, go back and reposition it.
- As soon as lockring begins to turn, remove quick-release skewer, then resume unscrewing lockring.
- Remove webbing clamp from wheel.
- Proceed same as if chain whip had been used: remove cassette, repair broken spoke, replace cassette, reinstall and tighten lockring using adjustable wrench, reinstall skewer, reinstall tire on wheel, reinstall wheel in frame.
Stein mini-cassette lockring removal tool substitutes not merely for the chain whip, but also for the lockring tool and adjustable wrench. The Stein tool fits into the cassette lockring just like a normal cassette lockring tool, but is much thinner. The wheel is then reinstalled in the frame and the pedals are cranked forward. The Stein tool is prevented from turning by the chain stays, with the result is that the lockring is forced to move counter-clockwise relative to the sprockets, thereby unscrewing it. Reverse the process to reinstall the lockring. The Stein tool weighs only 35 grams, versus 15 grams for my webbing clamp, plus 50 grams for a Park FR-5 cassette lockring tool, plus 135 grams for a wide-mouth 6" adjustable wrench. However, the adjustable wrench has other uses, so I would be carrying it anyway, thus a more realistic comparison is 35 grams for the Stein tool versus 65 grams for webbing clamp plus lockring tool. The Stein tool requires removing and then reinstalling the wheel on the frame three times, whereas my system requires a single removal and reinstallation, same as when using a chain whip. On the other hand, my system requires removing and reinstalling the tire, whereas the Stein tool does not. However, because of limited clearance, I have to deflate my tire anyway to remove the wheel from the frame, and once the tire is deflated, removing from the wheel is not that difficult. Also, removing the tire from the wheel is normally done anyway when replacing spokes, either to ensure the rim tape isn't damaged by turning an existing nipple, or to replace the nipple. The Stein tool procedure for removing a cassette is different from the normal procedure using a chain whip, whereas my system is similar. This might be a consideration when making repairs on the road under stressful conditions, where the more deviations from normal procedures, the greater the likelihood of making mistakes. If not installed correctly, the Stein tool can easily damage the derailleur hanger. The Stein tool consists of some very small parts, which must be unscrewed then screwed back together several times. There is risk of losing one of these small parts under field conditions.
Another approach is to simply make a very lightweight chain whip. Standard chain whips weigh 300 grams and up, but I have seen homemade chain whips that weigh under 100 grams. Still, this is considerably more than the 15 grams for my webbing clamp.